31
Oct
Some new users are asking how to use Level 2 head comb suite and we are here writing some tips for it.
It’s very easy to recognize each different head comb contained in the Level 2 head comb suite because each head comb has one different name on the comb itself.
For example, W3 5 means Western Digital 3.5″ HDDs, 5 platters (10 heads); ST 2 5 means Seagate 2.5″ laptop HDD head comb, 5 platters (10 heads). ST3-1 3: means Seagate 3.5″ HDDs, 3 platters, type 1.
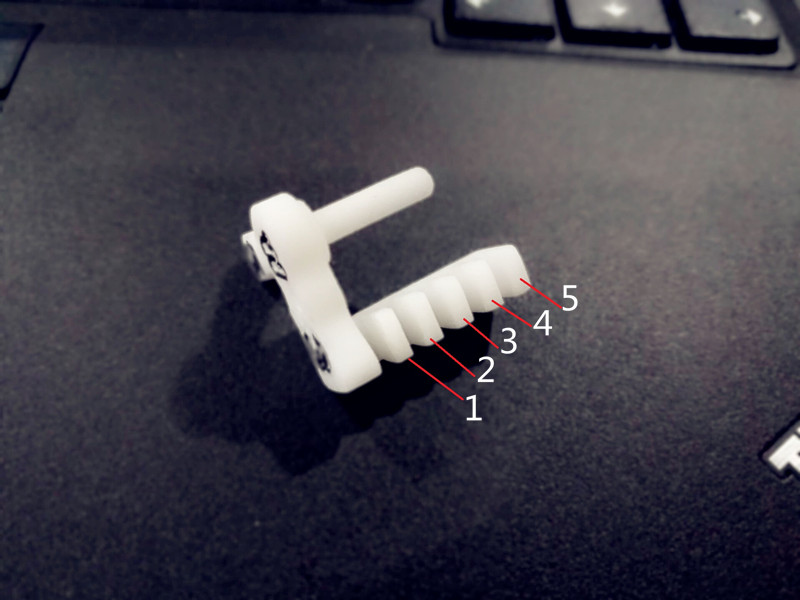
To find out which head comb is for which amount of platters, users can count the separators, please check the image below, if there’re 5 separators, this head comb is for hdds with 5 platters.
Some new clients ask is it a must to have two of each head comb. Well, it’s not a must. Many clean room engineers prefer to have two of each because they think one head comb can be used for patient drive heads and the other head comb can be used for donor drive heads. Some users want to save money and buy only one piece of each head comb, this works too. Because they can remove the damaged heads with the head comb and then put the damaged heads aside and then use the same head comb to install the donor heads to the patient drive.
Steps to use Level 2 head comb:
1, Open hard drives in clean room environment, remove all screws, specially sometimes hidden screws to fix the head stack;
2, Remove top magnet;
3, Install the head comb to the head arm;
4, Move the damaged heads out of the parking ramp;
5, Install the donor heads to the parking ramp. If the parking ramp is damaged sometimes, users need to swap the parking ramp too.